The Agro Forestry Dissertation
A dissertation of a forestry project is a lengthy, original research project to be completed as part of a doctoral program. It is partial of finishing my Bachelor of Science in Agricultural Economics. A degree of the University of Devisoria. But it is also a longer research project required for my later master’s degree.
- What is my doctoral program? To make Jessie’s Sunshine Farm a profitable and professional enterprise. My Master degree is in practical agricultural economics.
- What is the research? Agro-Forestry as outlined in Project Details, its detailed maps, market research in various attached PDF-Files, Intercropping feasibility analysis, planting implications, and Projected Income (private), which includes Goss Revenue, COGS, CAPEX, OPEX, EBIT and a projected growth over 7 years.
Why the efforts when you could relax?
Because I will get bored. And yes, it took more than three months. And yes, mostly, 12 hours a day for 7 days week. But the work is done and I handed out the marching orders for the next years, and the objective of this long mission.
If there was no suffering involved,
or hard work required, then
even the Lazy could succeed.
Boss Kano, December 2025

Some people finish a dissertation and take a vacation. Mostly students. Others finish a dissertation and accidentally build an entire agro-forestry framework for a real farm. Hands-On people of work. We work, we eat – the fruits of our work. We reap what we sow.
After months of deep research, field thinking, number crunching, tree spacing debates, and conversations that started with “what if…”, “maybe like…” I officially finished my agro-forestry dissertation for Jessie’s Sunshine Farm. This wasn’t theory for theory’s sake. This was a ground-level, boots-in-the-mud, will-this-tree-compete-with-that-tree kind of study.
Somewhere along the way, I realized something important:
If this only lives inside a dissertation PDF, it dies here. Hence, this is our declared marching order for the next few years, from planting, maintenance, marketing and sales, and branding.
So instead, over the last 24 months, the research escaped into the wild and became a series of focused, readable (and slightly opinionated) articles on OurMindanao.com. Each article or reel represents a major pillar of the dissertation — and together, they explain why we are now confidently entering Phase 3.
1. Does Sector Planning and Mapping Really Matter in the Farm?
(Spoiler: Yes. Very much yes.)
👉 https://ourmindanao.com/does-sector-planning-and-mapping-really-matters-in-the-farm/
This article exists because too many farms are planted like a buffet:
“Let’s put this tree here… and this one over there… and we’ll figure it out later.”
It is more like a culinary dish of delicious varieties, but unrecognizably piled into one big bowl covered by a mountain of rice.
Sector planning is the exact opposite of that.
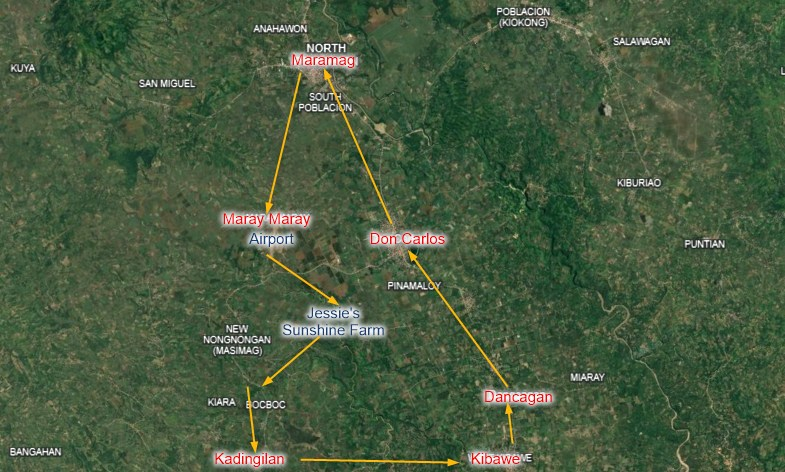
In the dissertation, this part dives into farm zoning, sun paths, slope behavior, water flow, and access routes. On the website, I translated that into plain language:
- Why not all land on the farm should be treated equally
- Where is the Central Area, CAR located
- Why coconuts don’t automatically mean “free shade for everything”
- Why ignoring slope direction or run offs eventually turns into erosion, nutrient loss, and regret.
- Plan and design beauty in the cliff and Panas section
- Why the late sun in the valley might not be beneficial for all crops.
- Not every fruit tree can be pruned to fit, let them grow
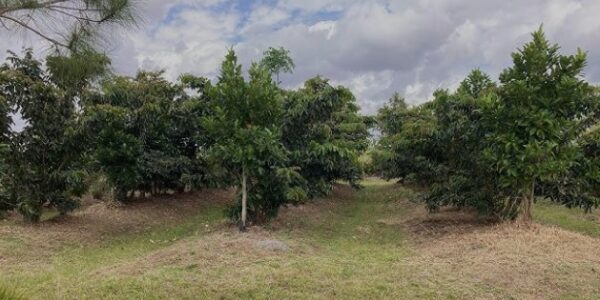
The general questions also was, which fruit trees can intercrop in a 4.5 meter mid point (between 2 coconut trees), without destroying neighboring root systems, or generating too much shade. Mapping is not about making the farm look pretty on paper. It’s about preventing future mistakes that cost years to correct. Once trees are in the ground, you’re negotiating with nature — and nature doesn’t care about excuses.
This webpage is the backbone of the dissertation. Many changes will still come, but, but, but due to planning and layout, things can easily be adjusted. The layout follows our General Layout System and is basically a MODULAR SYSTEM where crops can, and will, easily be exchanged and still provide harvest access. Each crop has to fit into this system. Here you will find all farm roads and sector layout.
Plan first. Plant second. Sleep better later.
2. Value Fruit Trees and Our Market Research
(Because “I like this fruit” is not a business strategy.)
👉 https://ourmindanao.com/value-fruit-trees-and-our-market-research/
This is where agro-forestry meets reality.
In this part of the website, I went deep into tree selection, not from a botanical fantasy perspective, but from a market-driven lens. The website breaks it down clearly:
- Which fruit tree actually moves in local and regional markets
- Why yield per tree matters less than consistent demand
- Why some “popular” trees quietly underperform financially, over supply
- How staggered harvest seasons stabilize farm income and OPEX
- Diversity is a strength, here, due to staggered harvest and cost equivalation during the year.
- If you plant friendly crops you can triple your farm size compared to monocultural farming.
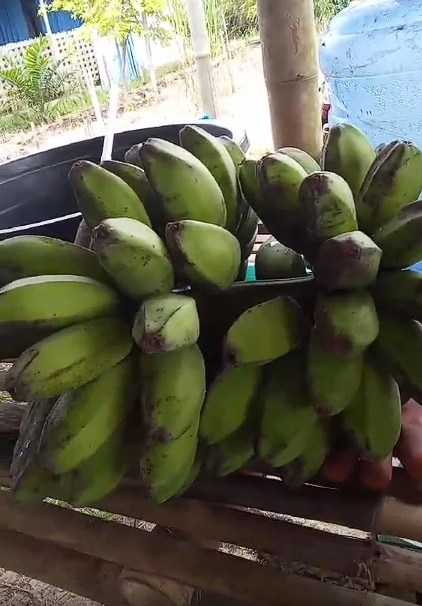
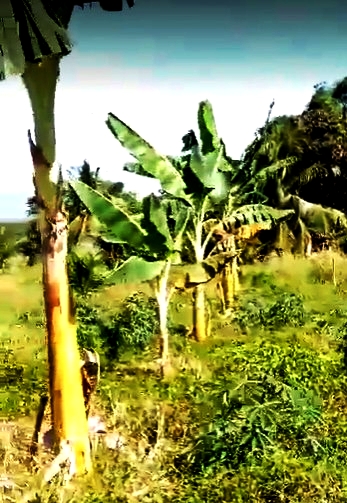
This article explains why Jessie’s Sunshine Farm is not just planting trees, but building a portfolio. Some trees are fast return, some are long-term anchors, and some exist because they support the system — shade, soil health, pollinators, and animal forage — not because they headline the sales list. Also, in order to compare bananas to coconuts, for example you must bring them to a common denominator.
For example, calamansi or banana, as a tertiary canopy crop, in our system, and a planting distance of 3 x 3 meters, you do not have 1,111 trees but due to intercropping only 740 trees /plants per hectare. And also to consider is that intercropping inevitable creates more shade and density. Yield will be reduced! We reduced all our yield generally to 80%. Hence to get the real numbers you must reduce yield per hectare in publications to 740 tress and reduce that yield then to 80%. This would be a realistic value for Jessie’s Sunshine Farm. I am confident we will succeed.
3. Project Development and Details
(Where dreams meet spreadsheets and either survive… or don’t.)
👉 https://ourmindanao.com/project-development-and-details/
This is the article that quietly scares people — and that’s a good thing.
Here, the whole research moves from concepts into execution:
- Phasing and milestones
- Labor realities
- Capital pacing
- Why doing everything at once is the fastest way to fail
The website lays out how the project is structured in phases, not because it sounds professional, but because farms are living systems. You don’t rush them — you sequence them.
You could compare our project more to an ocean steamer, which can change course only slowly but the course is set prior to leaving the harbor. And our belly is full of treasures.
On the other hand, a small speed boat of course is more flexible but therefor in cannot cross the ocean and only ship along the not so distant coast.

Life is not a competition because
It is not a finite game, like basket ball
Rules are not set by man,
But by the Lord, only
Boss Kano, December 2025
Phase 1 was procuring the land and basic access.
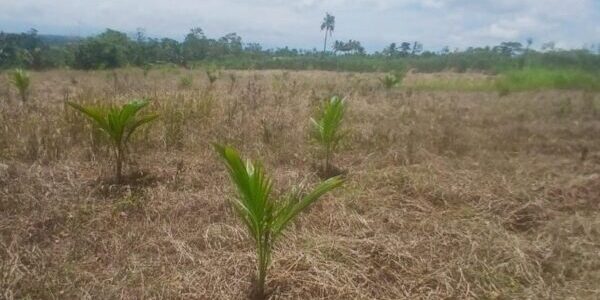
Phase 2 was designing the system and planting 800 coconuts.
And now…
Welcome to Phase 3 🚜🌴
Phase 3 is where the dissertation stops being “finished” and starts being used.
This is implementation with intention:
- Fruit Trees are planted where they should be, not where they fit
- Shade planned, not accidental
- Which trees have deep tap roots, which ones have lateral root system?
- Crops supporting each other instead of competing silently, canopies, roots
- Adjustments made early, while they’re cheap
- It is better to correct mistakes now instead of carrying them on
- laziness now will make you regret later
Phase 3 is also where the farm begins talking back. Some assumptions will be confirmed. Some will be challenged. That’s not failure — that’s agro-forestry done properly.
Final Words from Boss Kano 😄
Finishing the dissertation feels great. But the real win is this:
The research didn’t end as theory — it became a living system, a public framework, and a working farm plan. We offer you to use the research. We are not in a competition.
Jessie’s Sunshine Farm is no longer just planting trees.
It’s building resilience, income stability, and long-term ecological value — one well-planned decision at a time.
If people focus only on quick profit here or more promises over there and seek constant satisfaction or happiness, they will not be successful. They are addicts to the flesh.
Commit to the Lord whatever you do,
and he will establish your plans.
Proverbs 16:3
Now, if you’ll excuse me, Phase 3 has begun… and the trees are waiting. 🌱📐