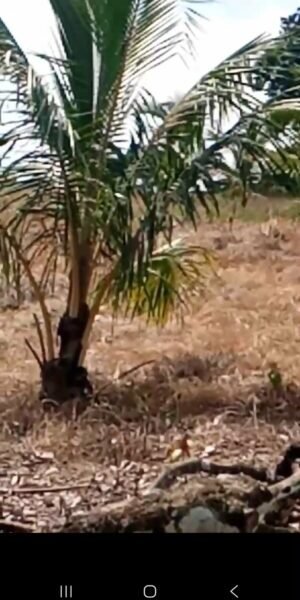
How to Plant Coconut Trees Easily
Moreover, this guide explains how coconut planting works at Jessie’s Sunshine Farm.
Coconut planting should start at the onset of the rainy season (typically May–June or when consistent rains begin in our area) so seedlings establish before any dry spell.
1. Initially, plan site selection and land preparation.
In order to prepare a good set-up for the seedlings we must for example:
- Choose well-drained land (avoid prolonged water logging). Soil depth ≥ 75 cm; coconuts tolerate sandy, loamy, or clayey soils (ideal pH 5.5–6.5).
- Clear weeds, shrubs, and debris. Level as needed and ensure good drainage.
- Mark planting points. Preferred triangular spacing:
- Tall varieties: 9 m × 9 m
- Hybrids/dwarfs: 8–8.5 m
Density roughly 100–160 palms per hectare.
Because erosion control is important when the surface is at risk of water erosion. For example, on sloping or erosion-prone land, install simple bamboo barriers before or right after planting.
- Drive sturdy bamboo sticks (stakes) firmly into the ground along the contour lines, spaced about 1–1.5 m apart.
- Weave thin bamboo strips (or split bamboo) horizontally between the stakes to form a low barrier or check structure (like a small woven fence or contour band).
- Cover the woven bamboo structure and the soil immediately up-slope and down-slope with a layer of organic mulch (dried weeds, coconut husks, fronds, rice straw, or farm wastes).
This slows surface runoff, traps soil and organic matter, reduces erosion, and helps moisture retention. Keep the mulch a short distance from the seedling trunk itself.
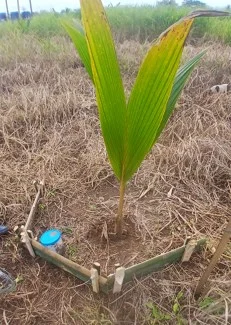
Repeat or reinforce barriers as needed on steeper slopes. This is a low-cost method.
2. As a next step, prepare planting holes to the specified digging depth.
- Dig holes 50 cm × 50 cm × 50 cm (about knee-deep) 1–2 months before planting so the soil can weather.
- Separate topsoil from subsoil.
- In heavier, rocky, or poorer soils, use larger holes (up to 1 m × 1 m × 1 m) and back fill with improved soil + organic matter.
- Place coconut husks, compost, or farm wastes at the bottom if available, then partially cover with topsoil.
3. Next, select and prepare seedlings.
- Use healthy 6–10 month-old seedlings (ideally 7–9 months) from a reliable/PCA-accredited nursery.
- Poly bag seedlings reduce transplant shock. Prune excess roots or damaged leaves if needed.
- Plant early morning or late afternoon.
4. Basal fertilizer application (at planting)
Add systemic insecticide into the bottom of the hole. Additionally, cover it with soil to keep the roots away. However, there should be a replacement for Furadan because it is toxic. We take what we can get because supplies are limited for coconut planting. Look for the following alternatives.
Systemic Insecticides as Safe Chemical Granules (Direct Soil Substitutes)
A synthetic granule to mix into the soil pit just like you would have done with Furadan, use one of these lower-toxicity alternatives:
- Fipronil Granules (e.g., Fipronil 0.3% GR): Mix 20 to 25 grams of fipronil granules thoroughly with the dug-out soil and organic manure inside the planting pit before setting the seedling. Fipronil creates a highly effective protective barrier against early soil insects and termites without the severe mammalian toxicity of Furadan.
- Cartap Hydrochloride 4G: Mix 15 to 20 grams into the soil bed at the bottom of the pit. It is a systemic insecticide absorbed by the roots that protects the young root system from subterranean pests during the critical initial weeks of establishment.
Fertilizer Mixing for Planting
Mix the fertilizer with topsoil in the hole before placing the seedling.
PCA general rates (no soil analysis): Inland (Jessie’s Sunshine Farm):
- Preferred, 150 g ammonium sulfate (21-00-00) + 200 g potassium chloride (00-00-60), or
- Alternative, 150 g ammonium sulfate + ~160 g common salt.
- Or last choice, half a small can of complete fertilizer (14-14-14) or organic manure/compost.
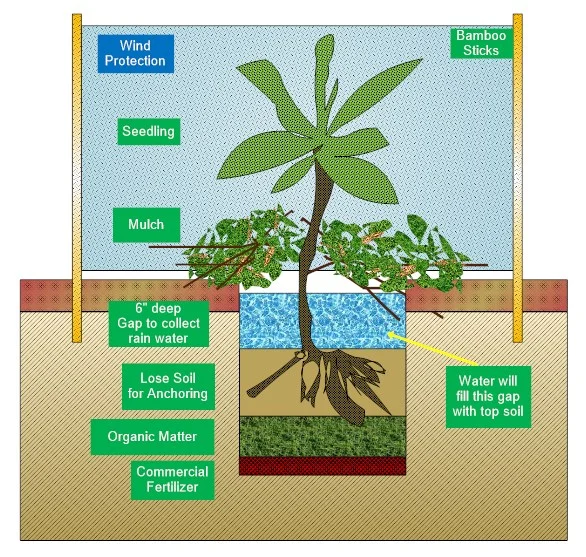
Position the seedling so the top of the nut is 4–8 cm below ground level! Fill with loose topsoil, firm gently around the base (do not bury the collar or compact hard), and leave a slight depression or low mound for water management. Make sure the roots will not touch the fertilizer or the insecticide!
5. Mulching
- Spread organic mulch (dried weeds, coconut husks, fronds, rice straw, etc.) in a ring around the seedling, keeping it a short distance from the trunk.
- On erosion-prone sites, extend the mulch over and around the woven bamboo barriers as described above.
- Benefits: conserves moisture, suppresses weeds, moderates soil temperature, adds organic matter, and (with the bamboo) controls surface erosion.
- Replenish as it decomposes. Avoid thick piles directly against the stem!
6. Immediate aftercare
- Protect from animals (place a triangle like (3 sticks in the ground) individual guards from rice or cassava sacks, see image to the right).
- Water if rains are delayed.
- Keep a 1–2 m radius around each palm relatively weed-free.
- Check that water does not stand in the planting hole.
- Inspect bamboo barriers after heavy rains and repair or reinforce if needed.
- Add sticks and tie the Coconut to it if the wind is blowing hard in that area. We want to avoid crooked growth.
7. Follow-up fertilization
Apply in split doses (start of rains and mid/late rainy season). Approximate rates per palm you can find on our website. Place fertilizer in a ring under the canopy and incorporate into the soil lightly.
Pest management (insecticide notes)
Use Integrated Pest Management. Monitor for coconut scale insect (cocolisap), rhinoceros beetle, and leaf beetles. Prefer cultural and biological controls. For chemical options (including approved organic sprays). We use mostly Karate.
Important success points include hole depth, basal N + Cl/K fertilizer, and proper planting depth of the nut. Mulching, and the bamboo-woven + mulch barriers on erodible slopes give seedlings the strongest start. The first 3–4 years are critical. Contact your nearest PCA provincial office or municipal agriculturist for soil testing, quality seedlings, and site-specific advice.
You might like the following pages as well.